Archive for November, 2008
Pink Kimchi
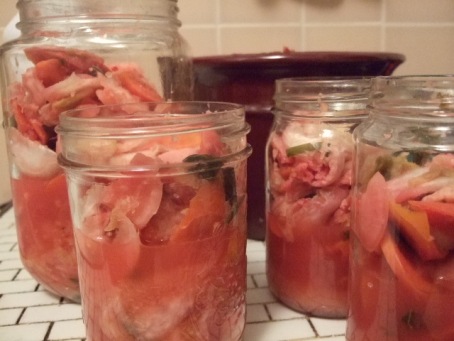 This is my 6th batch of kimchi. Every batch is slightly different, and this one turned out pink from the red carrots from my garden!
People have been fermenting foods since ancient times, mainly as a way to preserve food. This is done through a process called lacto-fermentation, where starches and sugars in food are converted into lactic acid. Lactic acid is a natural preservative that inhibits putrefying bacteria. Every culture has there favorite varieties of fermented foods. Korea’s is kimchi. I am kind of addicted. You can taste the “life” in it! My batches take about 7 days, and I taste it every day to see how it is coming along. I can barely wait for the batch to be done. As soon as it is ready, I usually take a jar to my friend Matt, who in one smooth motion grabs it out of my hands, and instantly starts dipping his fingers in and munching. Fermented foods are alive with beneficial organisms called lactobacilli, which help promote the growth of healthy flora throughout the intestine. Digestibility and vitamin levels of the fermented foods are increased. Many cultures eat just a small bit of fermented foods with each meal to aid in digestion.
I’m diggin’ the recipes and knowledge that I gain from these two books!!
- Nourishing Traditions by Sally Fallon
- Wild Fermentation by Sandor Ellix Katz
Baechu (Cabbage) Kimchi
Basic kimchi from “Wild Fermentation”
Ingredients:
- Sea salt
- 1 pound Chinese cabbage (napa or bok choi)
- 1 daikon radish or a few red radishes
- 1 to 2 carrots
- 1 to 2 onions and/or leeks, scallions, shallots (or more!)
- 3 to 4 cloves of garlic (or more!)
- 3 to 4 hot red chilies (or more!) or any form of hot pepper (without chemical preservatives)
- 3 tablespoons (or more!) fresh grated gingerroot
Process:
- Mix brine of about 4 cups H20 & 4 tablespoons salt. Stir to dissolve thoroughly.
- Coarsely chop cabbage, slice radish & carrots, and let veggies soak in brine, covered by a plate or other weight to keep veggies submerged, until soft, a few hours or overnight. Add other veggies to brine, such as snow peas, seaweeds, jerusalem artichokes, anything you like.
- Prepare spices: Grate ginger, chop garlic & onion, remove seeds from chilies and chop or crush, or throw them in whole. Kimchi can absorb a lot of spice. Experiment with quantities. Mix spices into paste.
- Drain brine off veggies, reserving brine. Taste veggies for saltiness. You want them to taste decidedly salty, but not unpleasantly so. I too salty, rinse them. If you cannot taste salt, sprinkle with a couple of teaspoons and mix.
- Mix veggies with ginger-chili-onion-garlic paste. Mix all thoroughly and stuff into clean quart-size jar. Pack tightly into jar, pressing down until brine rises. If necessary, add a little of reserved vegetable-soaking brine to submerge veggies. Weight the veggies down with a smaller jar, or a zip-lock bag filled with some brine. Cover the jar to keep out dust and flies.
- Ferment in your kitchen or other warm place. After about a week of fermentation, when it tastes ripe, move it to the refrigerator.
You can start eating it right away, but it will keep for months in the refrigerator, and the flavor develops more over time.
Okay, that’s it for today. I think I will go to the store now to gather the ingredients for batch #7!
To compost or not to compost
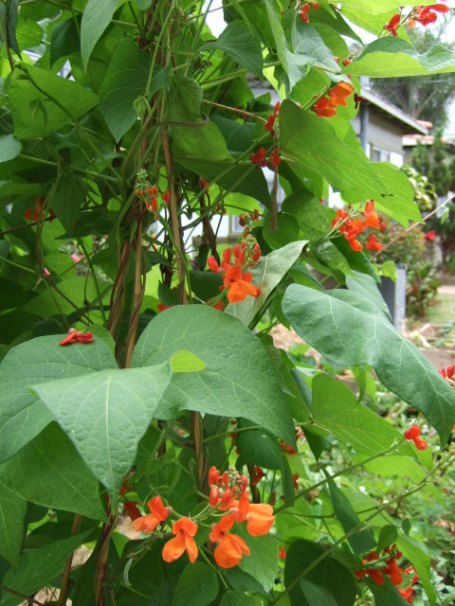
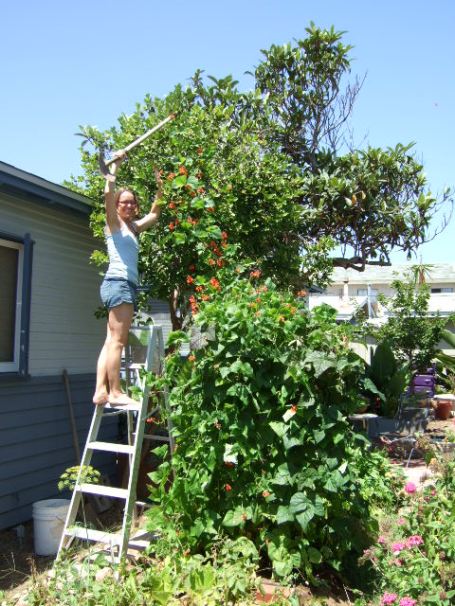
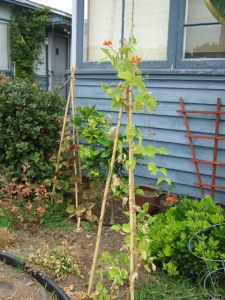
I have a small garden patch (about 5×15) between my cottage and the one in front of me, to which I have added compost twice a year for 3 years. Initially, the ground was rock hard and crusty. I chipped away at it with a shovel for about a week. A jack hammer would have been easier. I like having the satisfaction of knowing what effort I put in, and seeing the results. The first year the plants were all very shabby and scraggly, but each year they have become more prolific. These are scarlet pole beans that eventually climbed way up into an adjacent tree!
This year my neighbor and I planted some beans in a bed in which we had not added compost. The results are in!
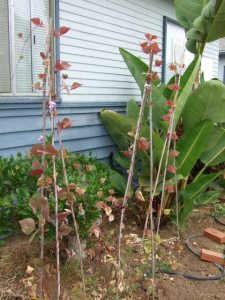 This
This
is
as
good
as
it
got!
Stackable Wood Bin
I constructed my compost bin a couple of years ago. My neighbors are invited to contribute to it. I chose this design to make turning the pile easier. To turn the pile, you remove the top tier and place it on the ground next to the bin, scoop some of the compost into the new pile, add another tier, and so on, until you have turned the whole thing. I’m happy to be taking my trash out to the dumpster less frequently, and to be adding back valuable nutrients to the soil, and then receiving those nutrients back in the food I’ve grown. If anyone is wishing they too could make one of these, well the plans for this design and others are here at Digitalseed.
